
My Luthier
Your local luthier services in London
We are luthiers of violins, violas & cellos
-
Violin Luthier
We specialise in making and restoring all sizes of violin from 1/16 - 4/4 at all levels, from student violinists to professionals.
We construct violins from the finest materials, carefully sourced from around the world to make the highest quality instruments possible.
To find out more about the work of a violin luthier, click on the button below:
-

Viola Luthier
We construct and repair violas of all sizes using professional lutherie methods, honed through years of training across Europe.
Our violas are made with our own special model, using old Cremonese techniques and methods used by the Italian old master instrument makers.
To find out more about the work of our viola luthiers, click on the link below:
-

Cello Luthier
We are expert cello restorers and makers, working with all sizes of cellos from 1/16 - 4/4. We also repair and adjust baroque cellos and transitional instruments.
Cello making and repairs are undertaken with the long term in mind, preserving and extending their lives with care and professionalism.
To find out more about our work as cello luthiers, click on the link below:
Jobs undertaken as a luthier
-

Making
We make all of our instruments from the finest quality timber, carefully sourced from across the world. Every instrument is constructed by hand using classical techniques over 4-5 weeks using over 80 pieces of wood.
-

Varnishing
As luthiers we use classical varnishing techniques that have been passed down through the centuries. The finest oil varnish is cooked, combining oils & resins to create a deep, colourful highly transparent varnish
-

Gluing
We use a range of traditional luthier glues to make sure that your instrument is glued together properly. Ensuring the safety, security and longevity of your violin, viola or cello is preserved.
-

Setting Up
We pride ourselves on the Great British luthier’s tradition of excellent instrument set up. A good set up with a luthier will ensure that your violin, viola or cello is playing and sounding to the best of its abilities.
-

Cleaning
Cleaning is a job best done by our trained luthiers. We will carefully assess the nature of the varnish on your instrument, then use the finest cleaning products specifically for wood and varnishes.
-

Listening
One of the most important parts of being a luthier is listening. Every player is unique and so listening to your requirements is essential. We provide a bespoke service for every player, including our very popular sound adjustment sessions.
Customers are welcome to contact us using the link below, where we aim to respond to you within the hour:
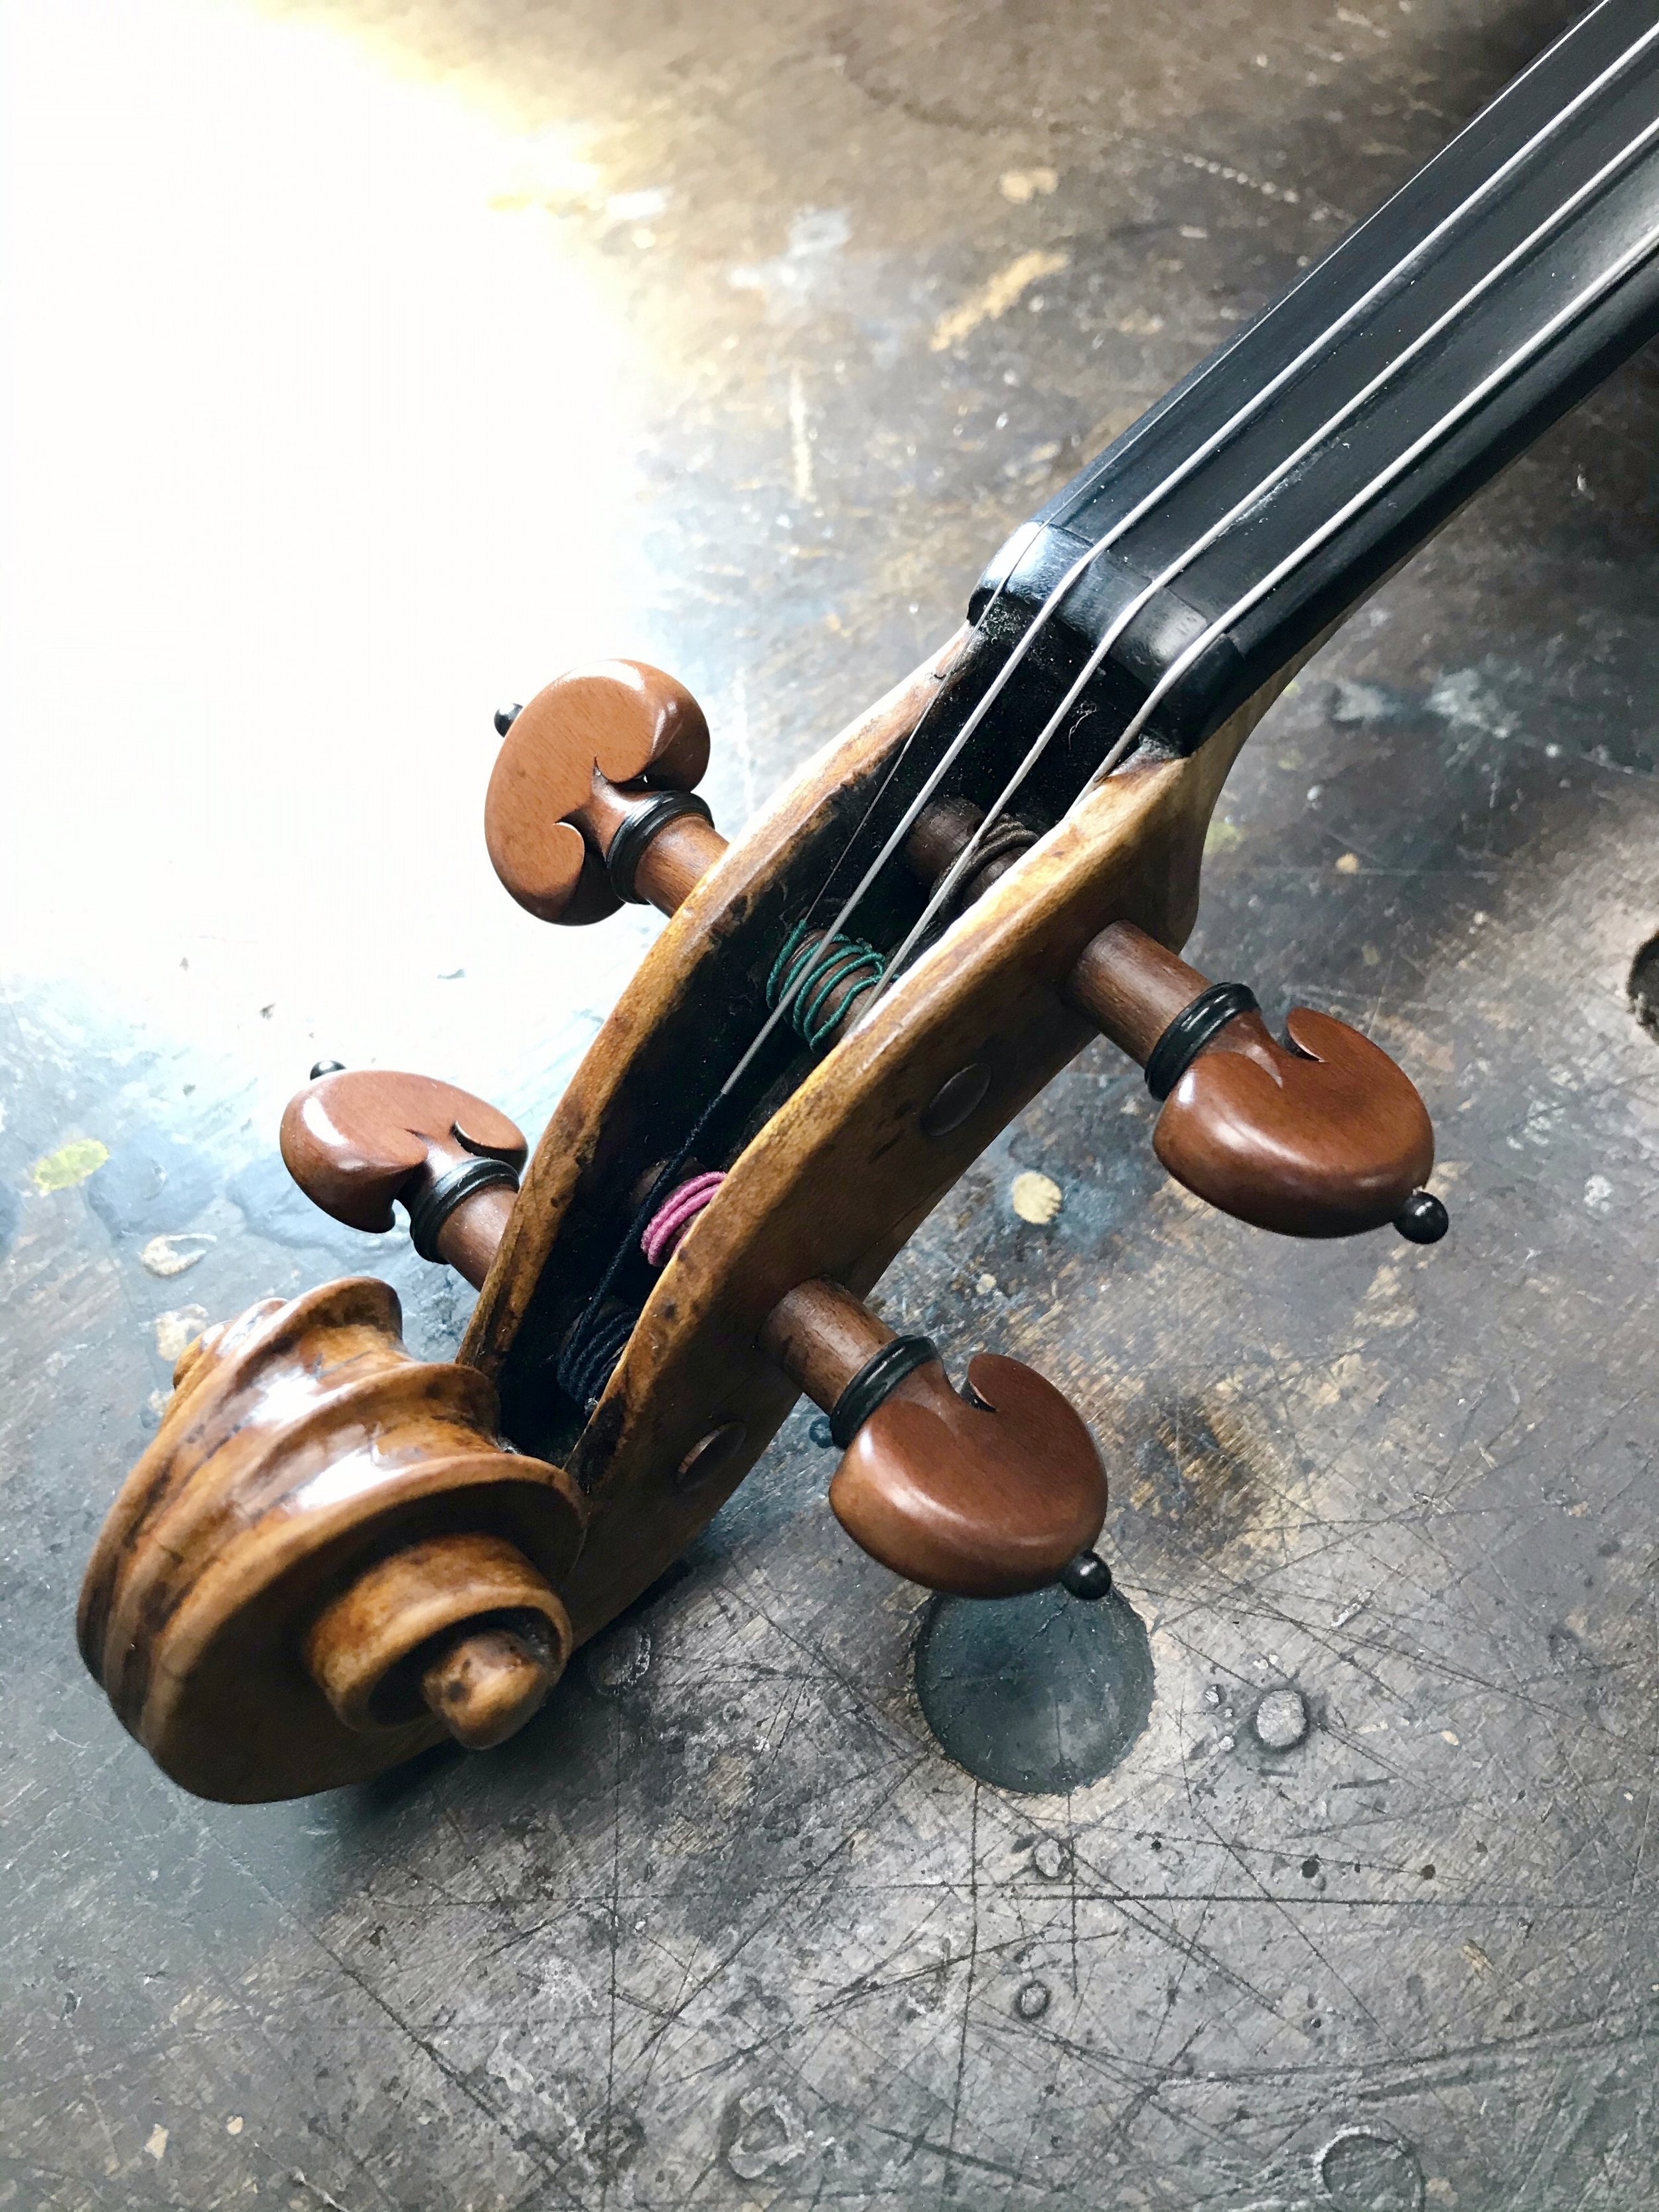
Restoring a broken violin corner
This example of a violin corner restoration from the Ruschil workshop shows the step by step process, as described in detail below.
The process of restoring a violin corner begins with assessing the damage and the other corners, As luthiers, one of our jobs is to preserve the originality of the instrument as best possible. By looking at the other corners and taking measurements, we can get an idea of what the new corner should look like. Looking at other historical examples by the maker is also a great reference.
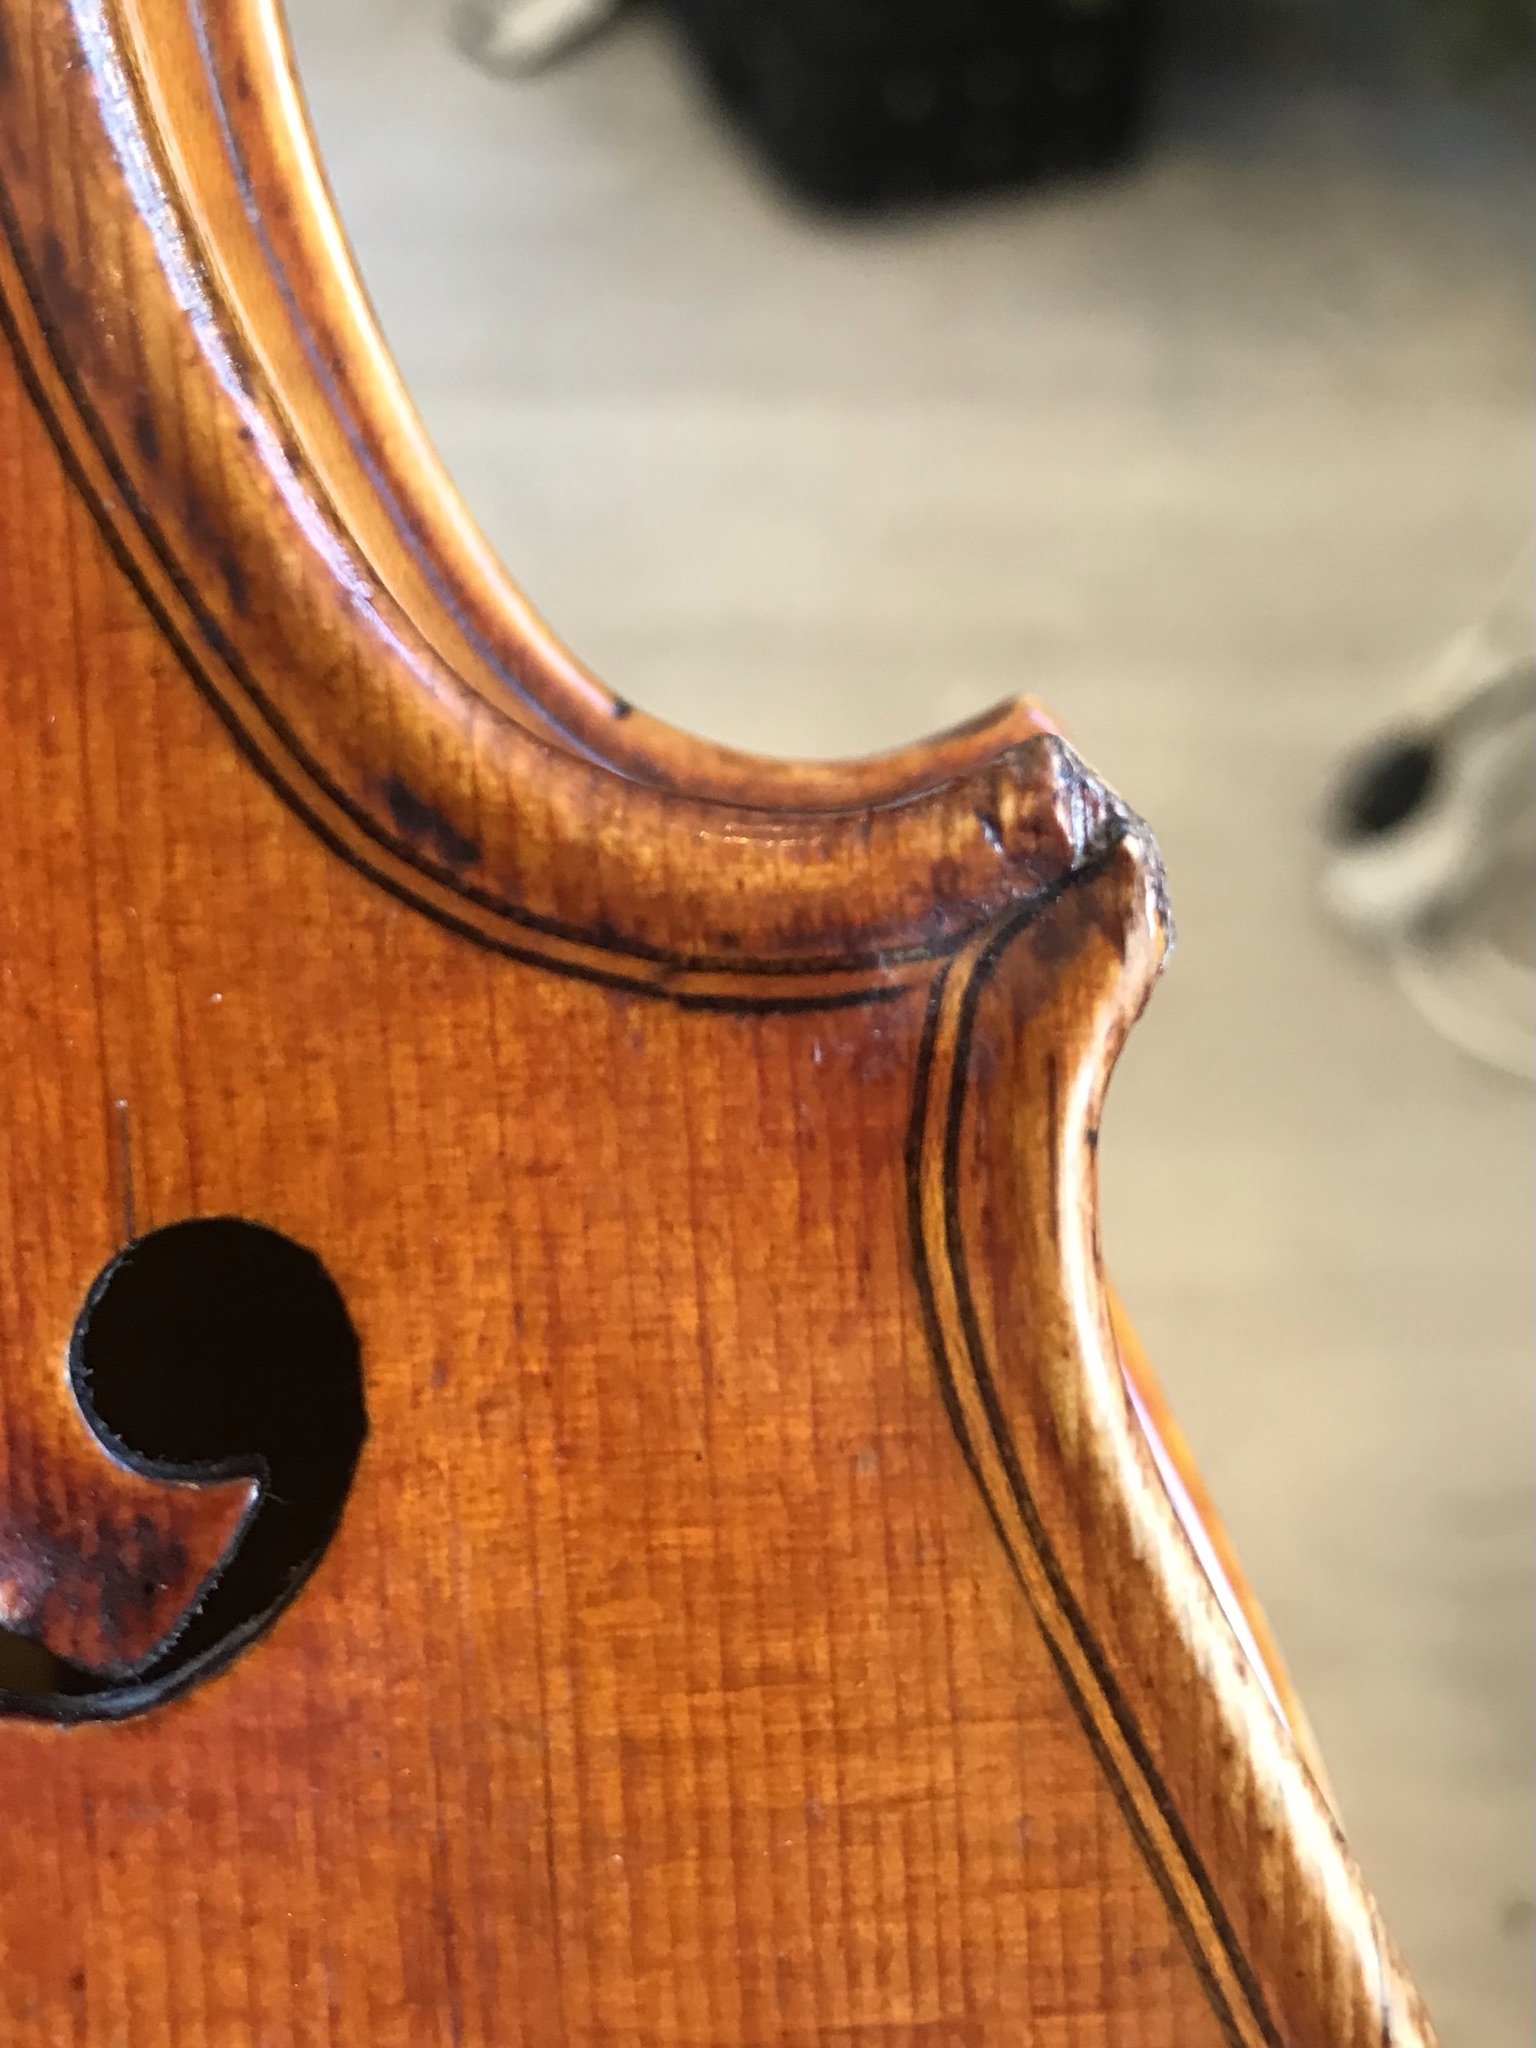
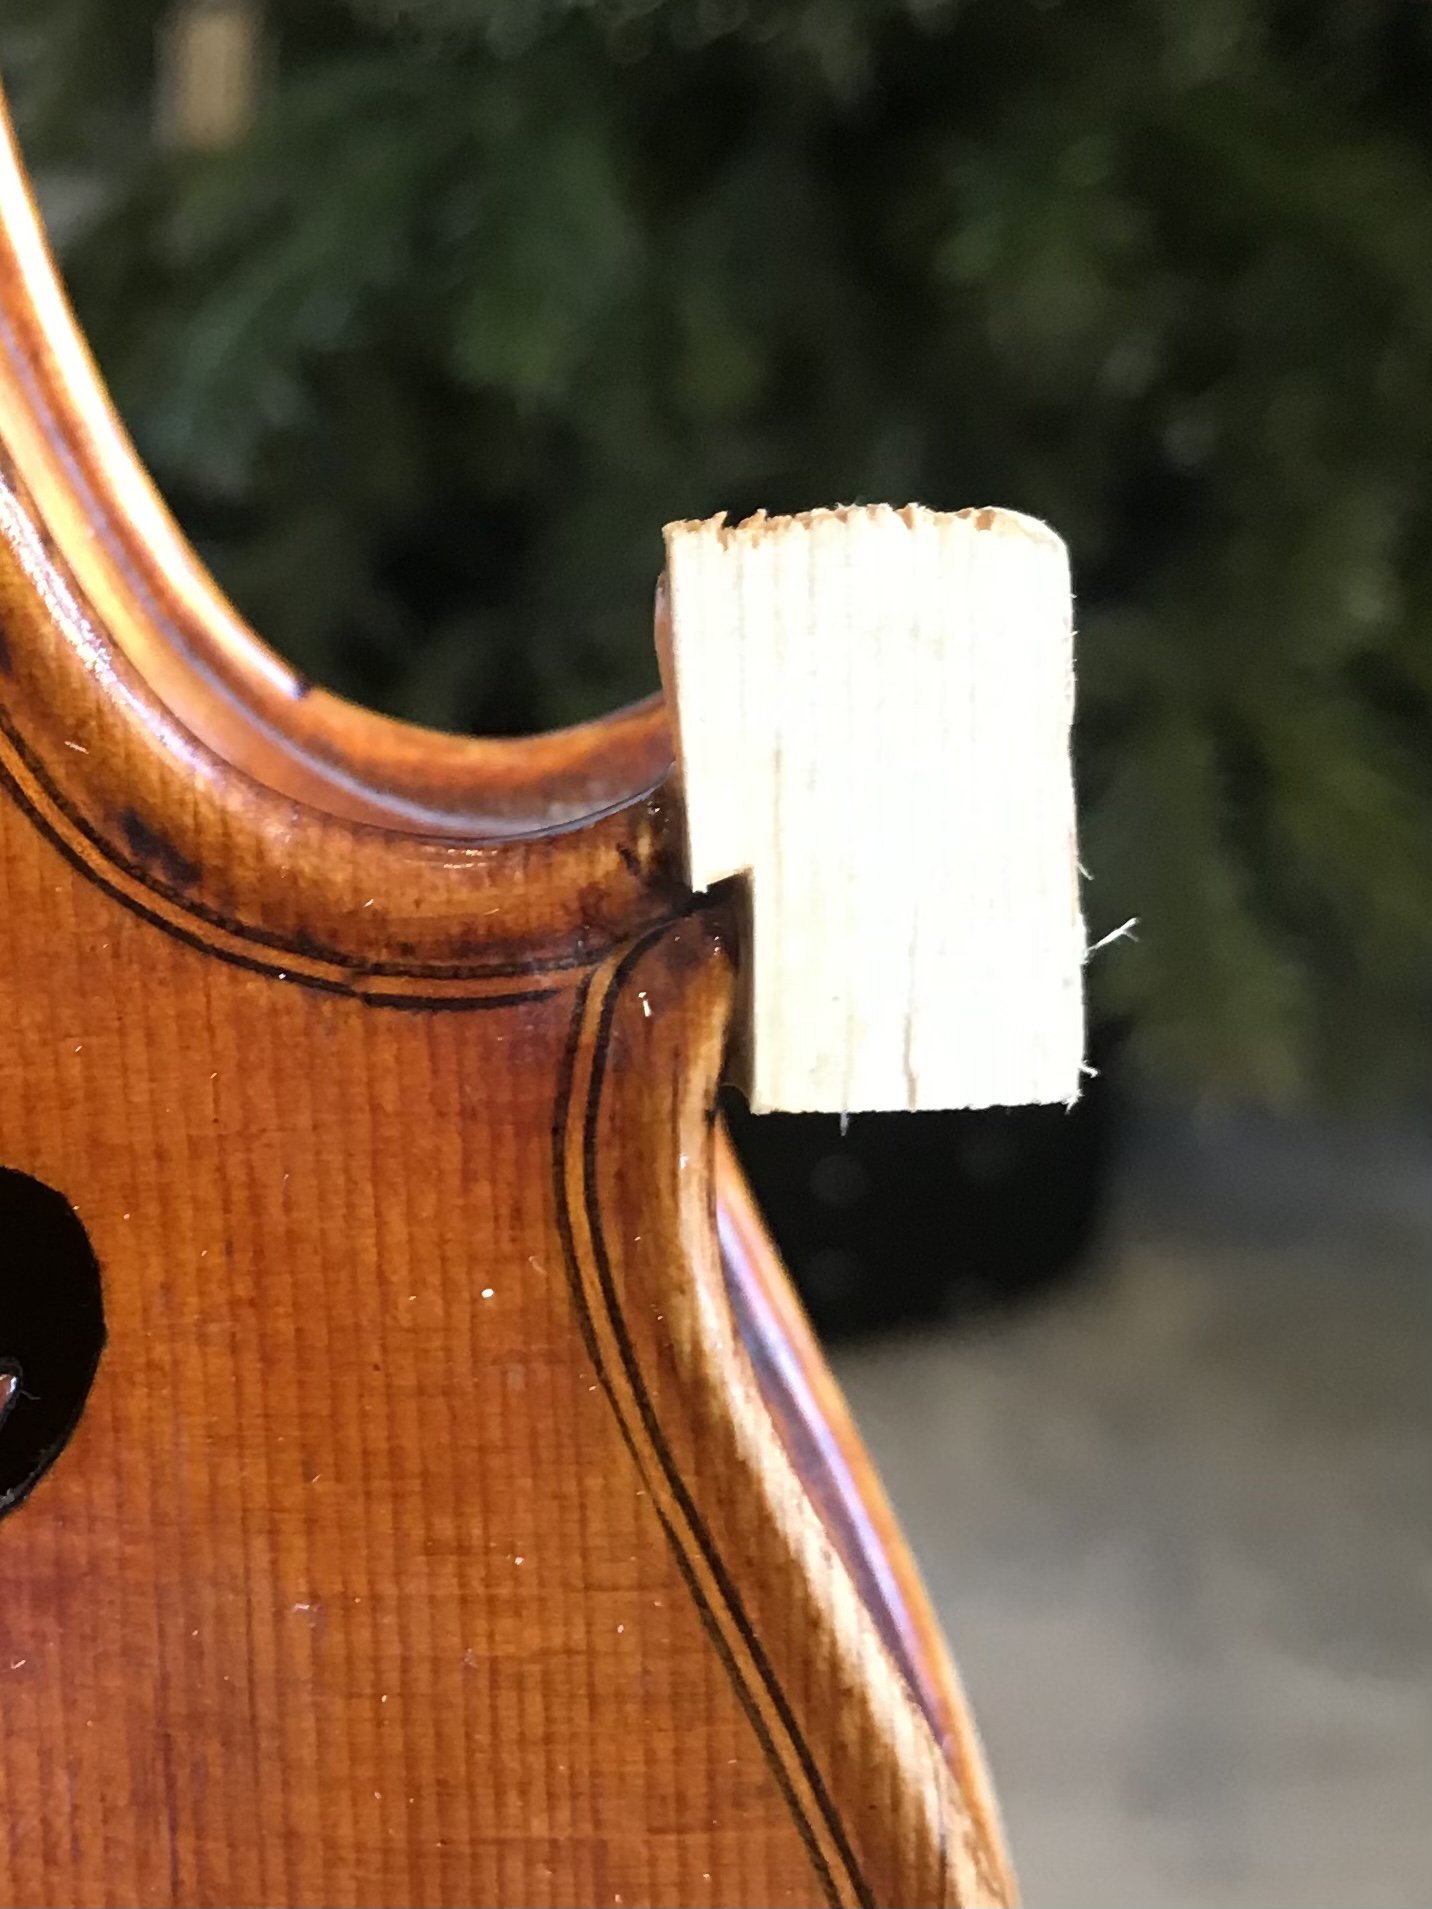
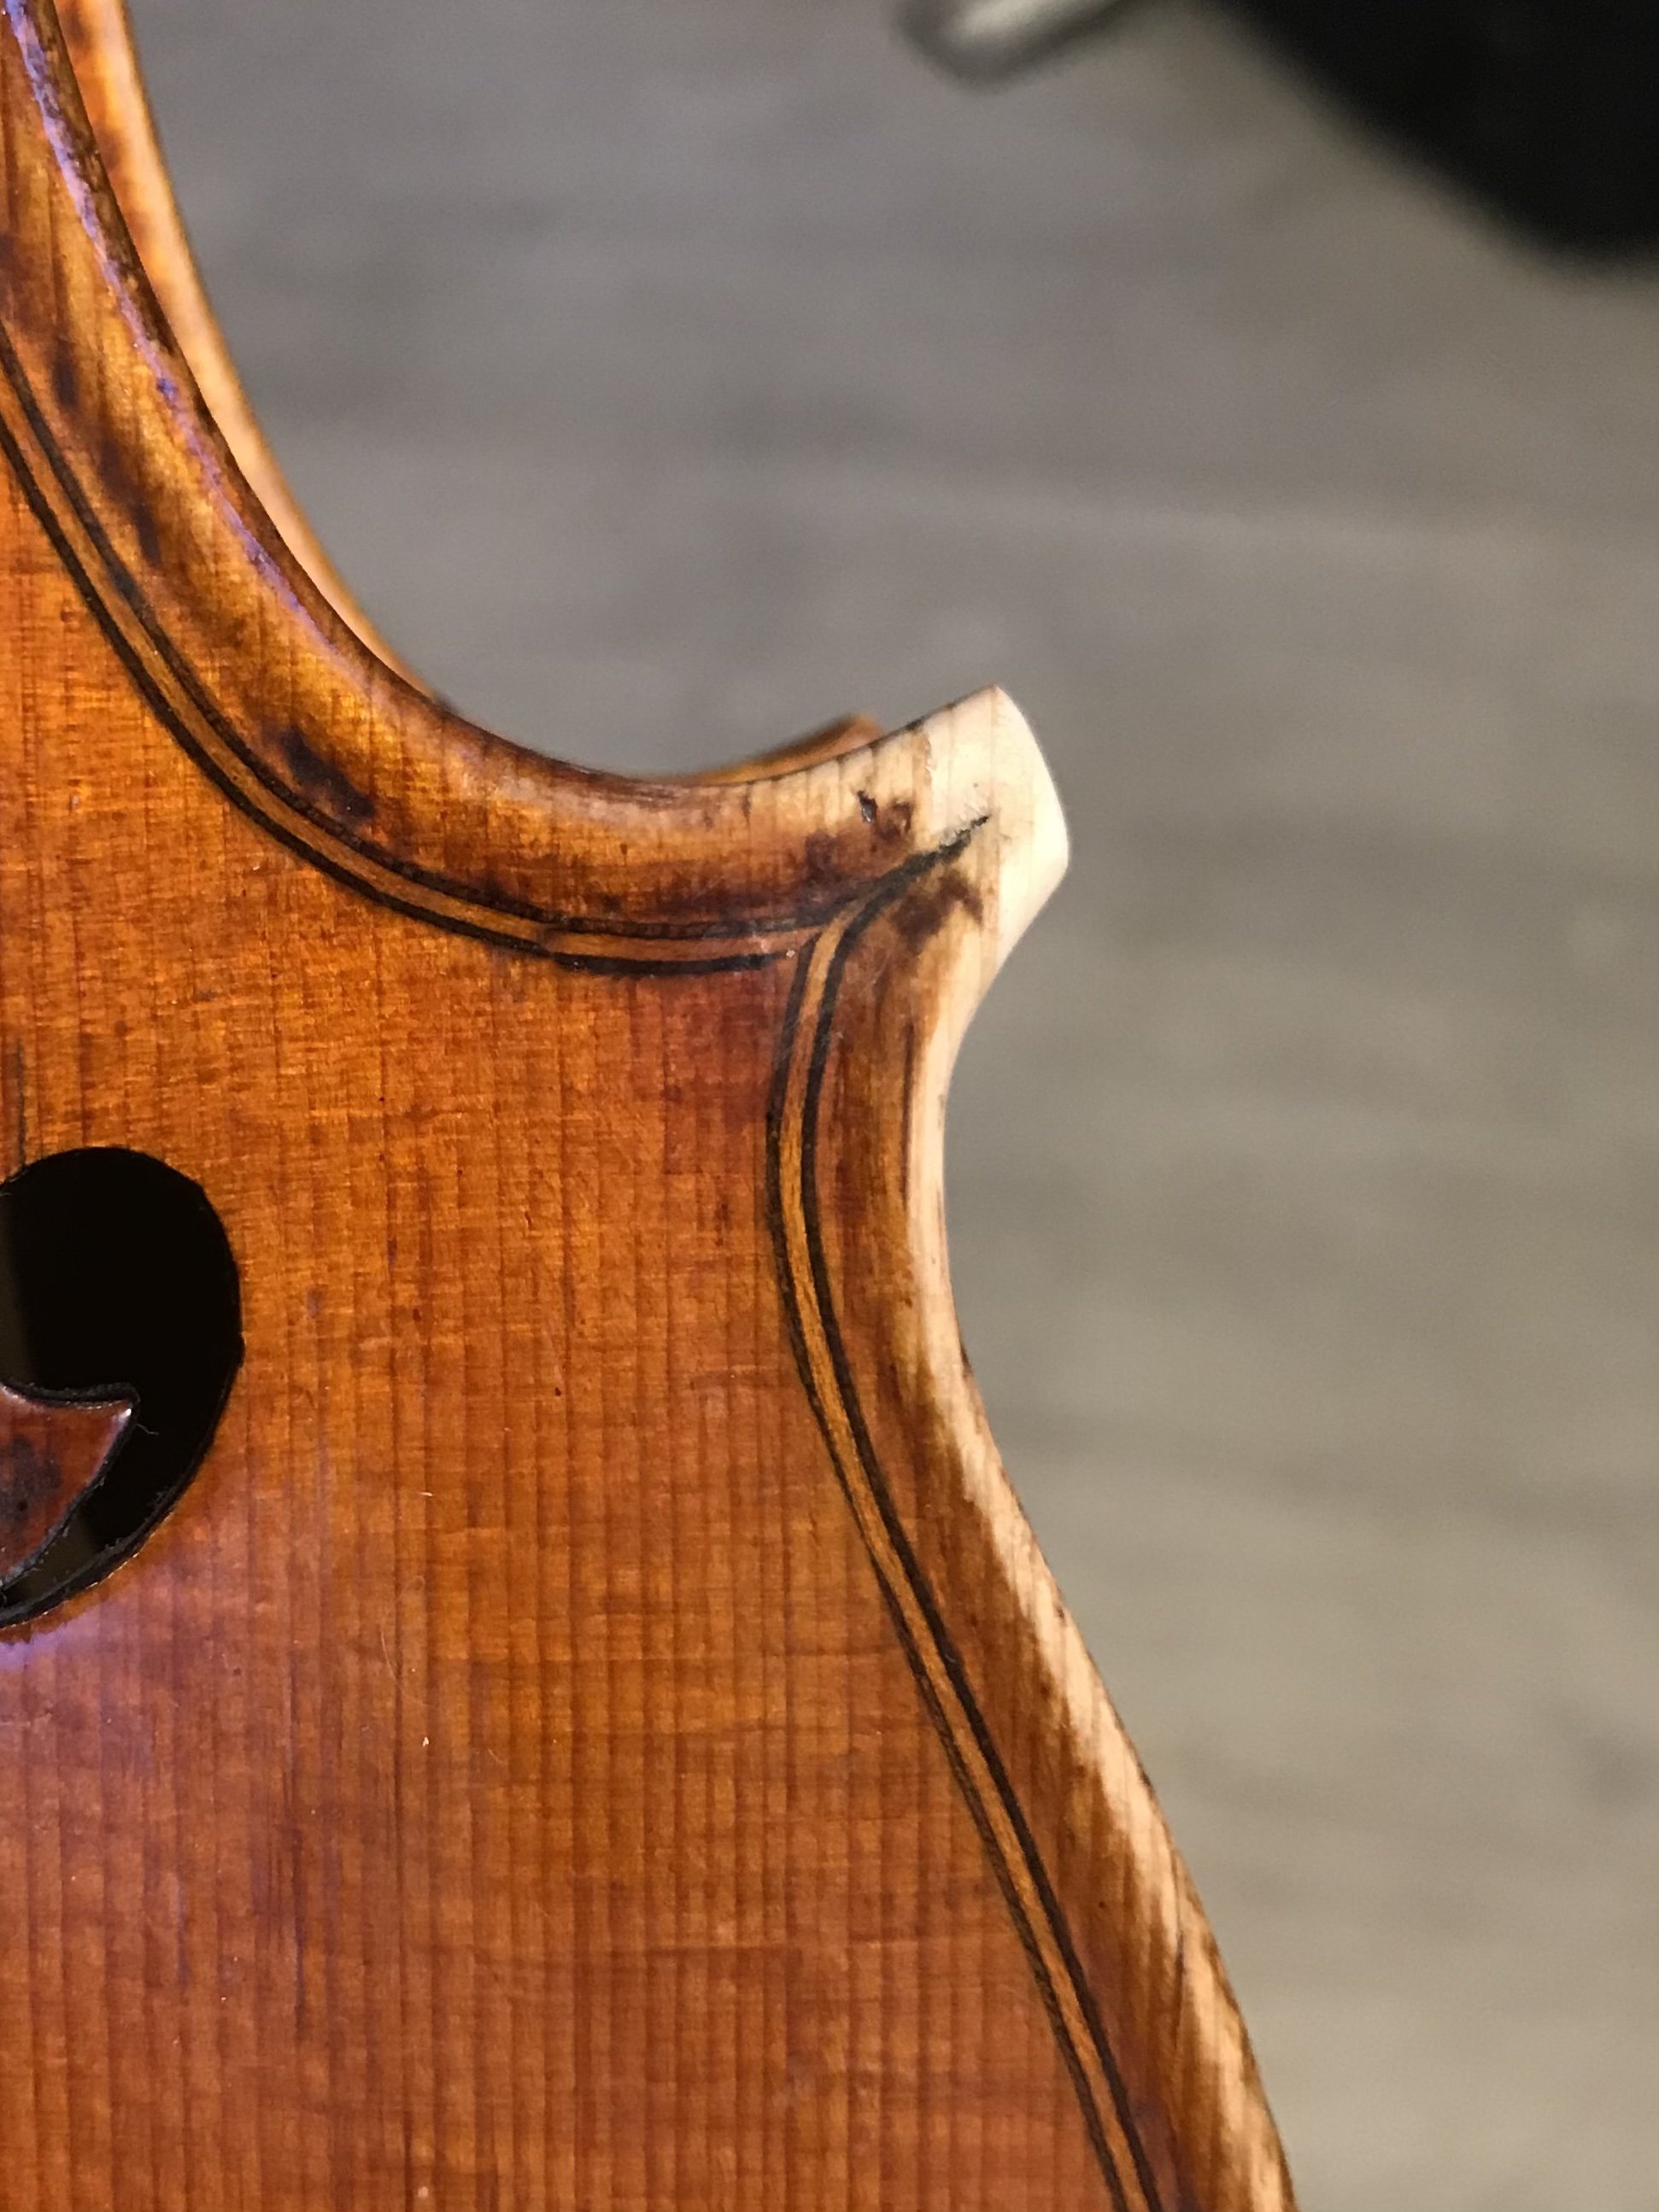
Photo 1: The broken and damaged corner. In this case, the corner has been worn and chipped over the years, causing it to look very different from the others. Dirt has built up in the fibres of the wood too. Left like this, it can also snag easily and damage the instrument further.
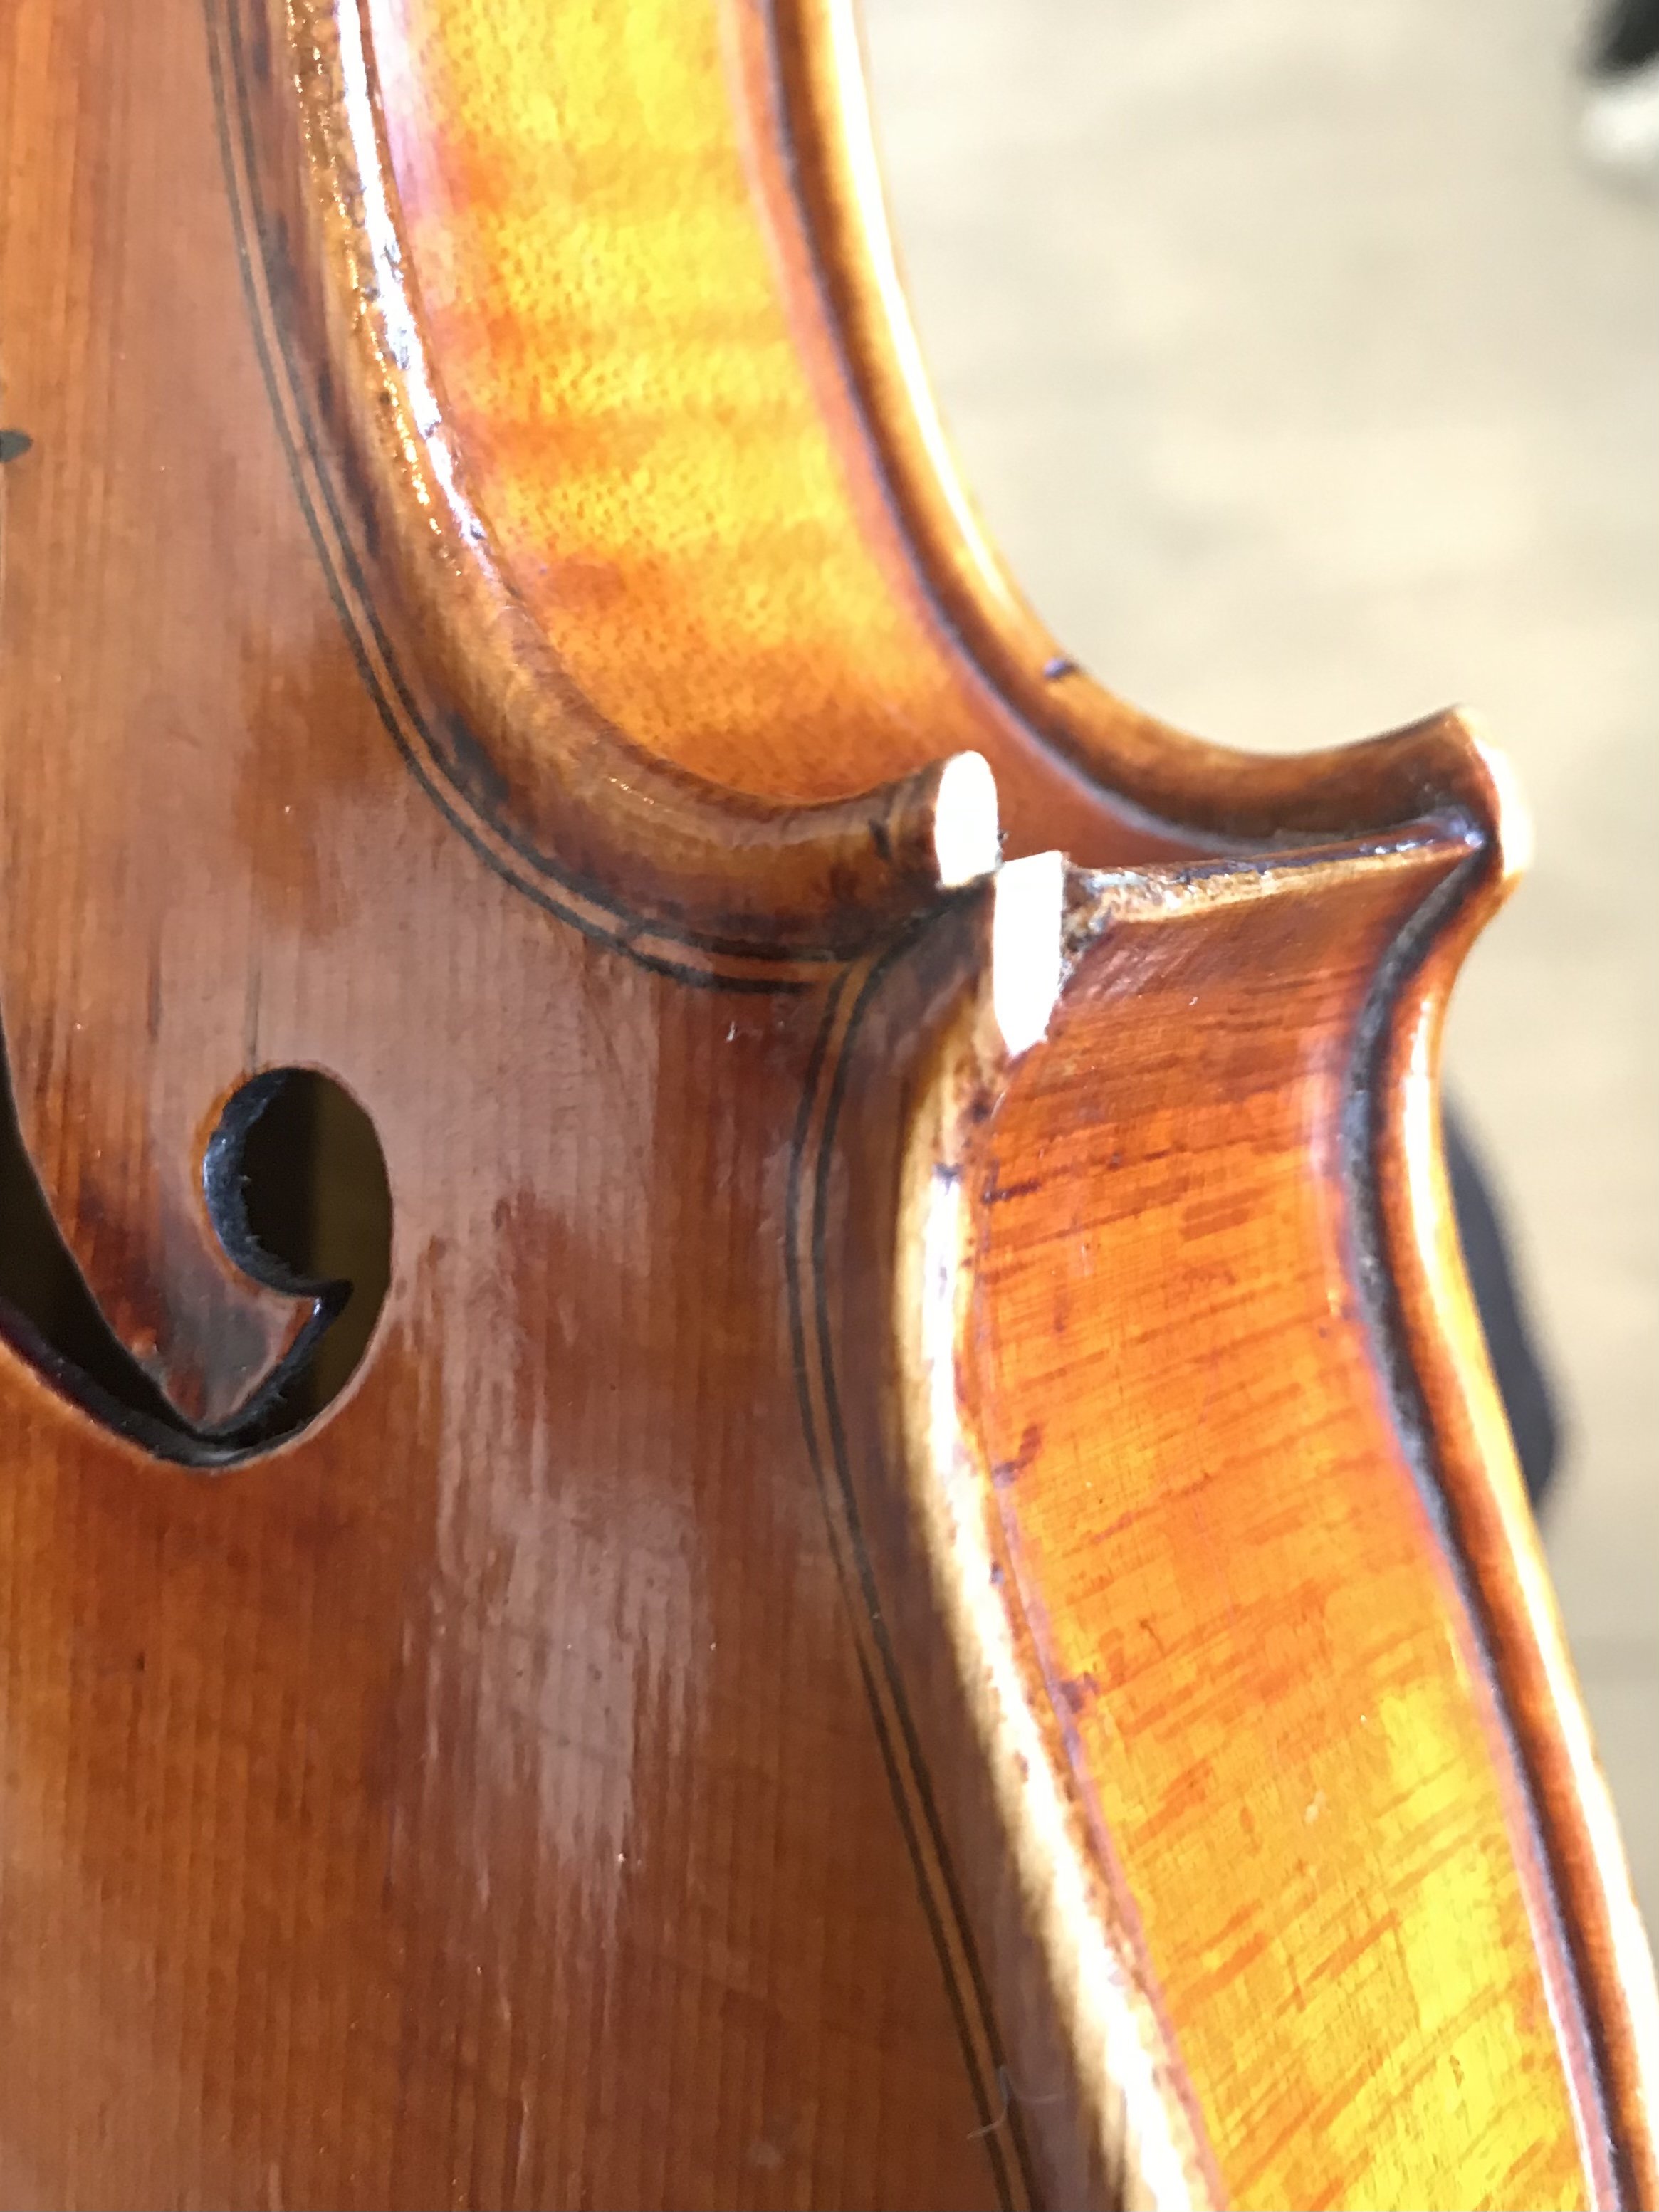
Photo 2: Cutting out the damaged wood. Using a very sharp chisel, cuts are made in a zig zag shape. This is done to keep the joint as strong as possible, whilst also preserving the original purfling (inlay) of the violin. We will fit the new piece of wood to this shape.
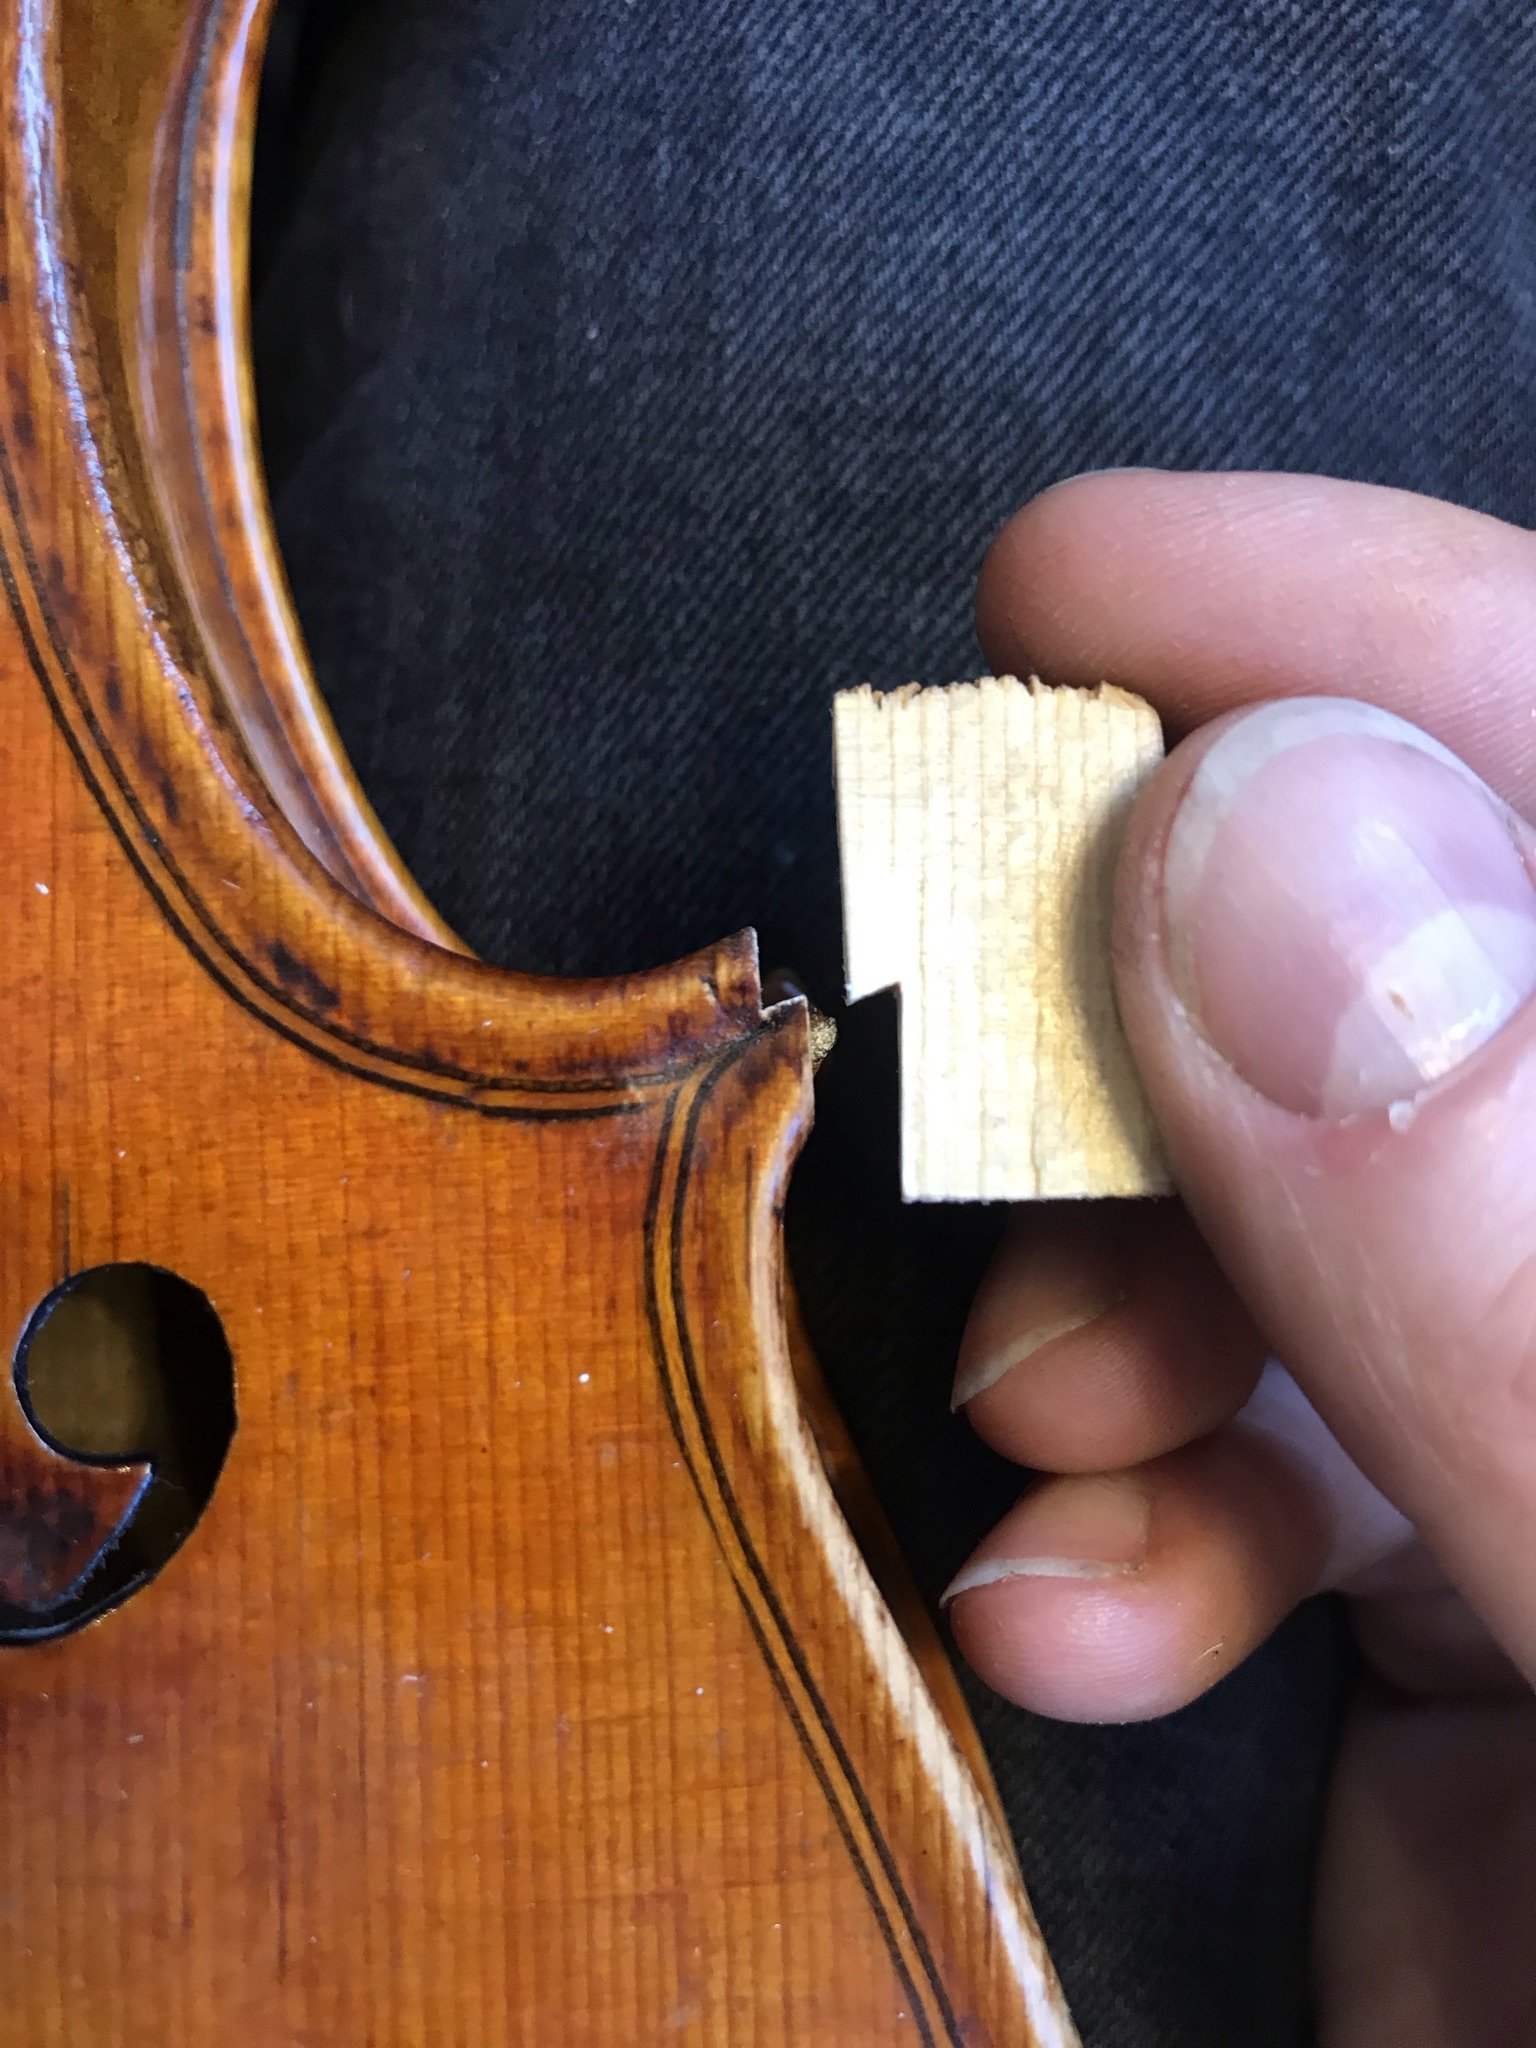
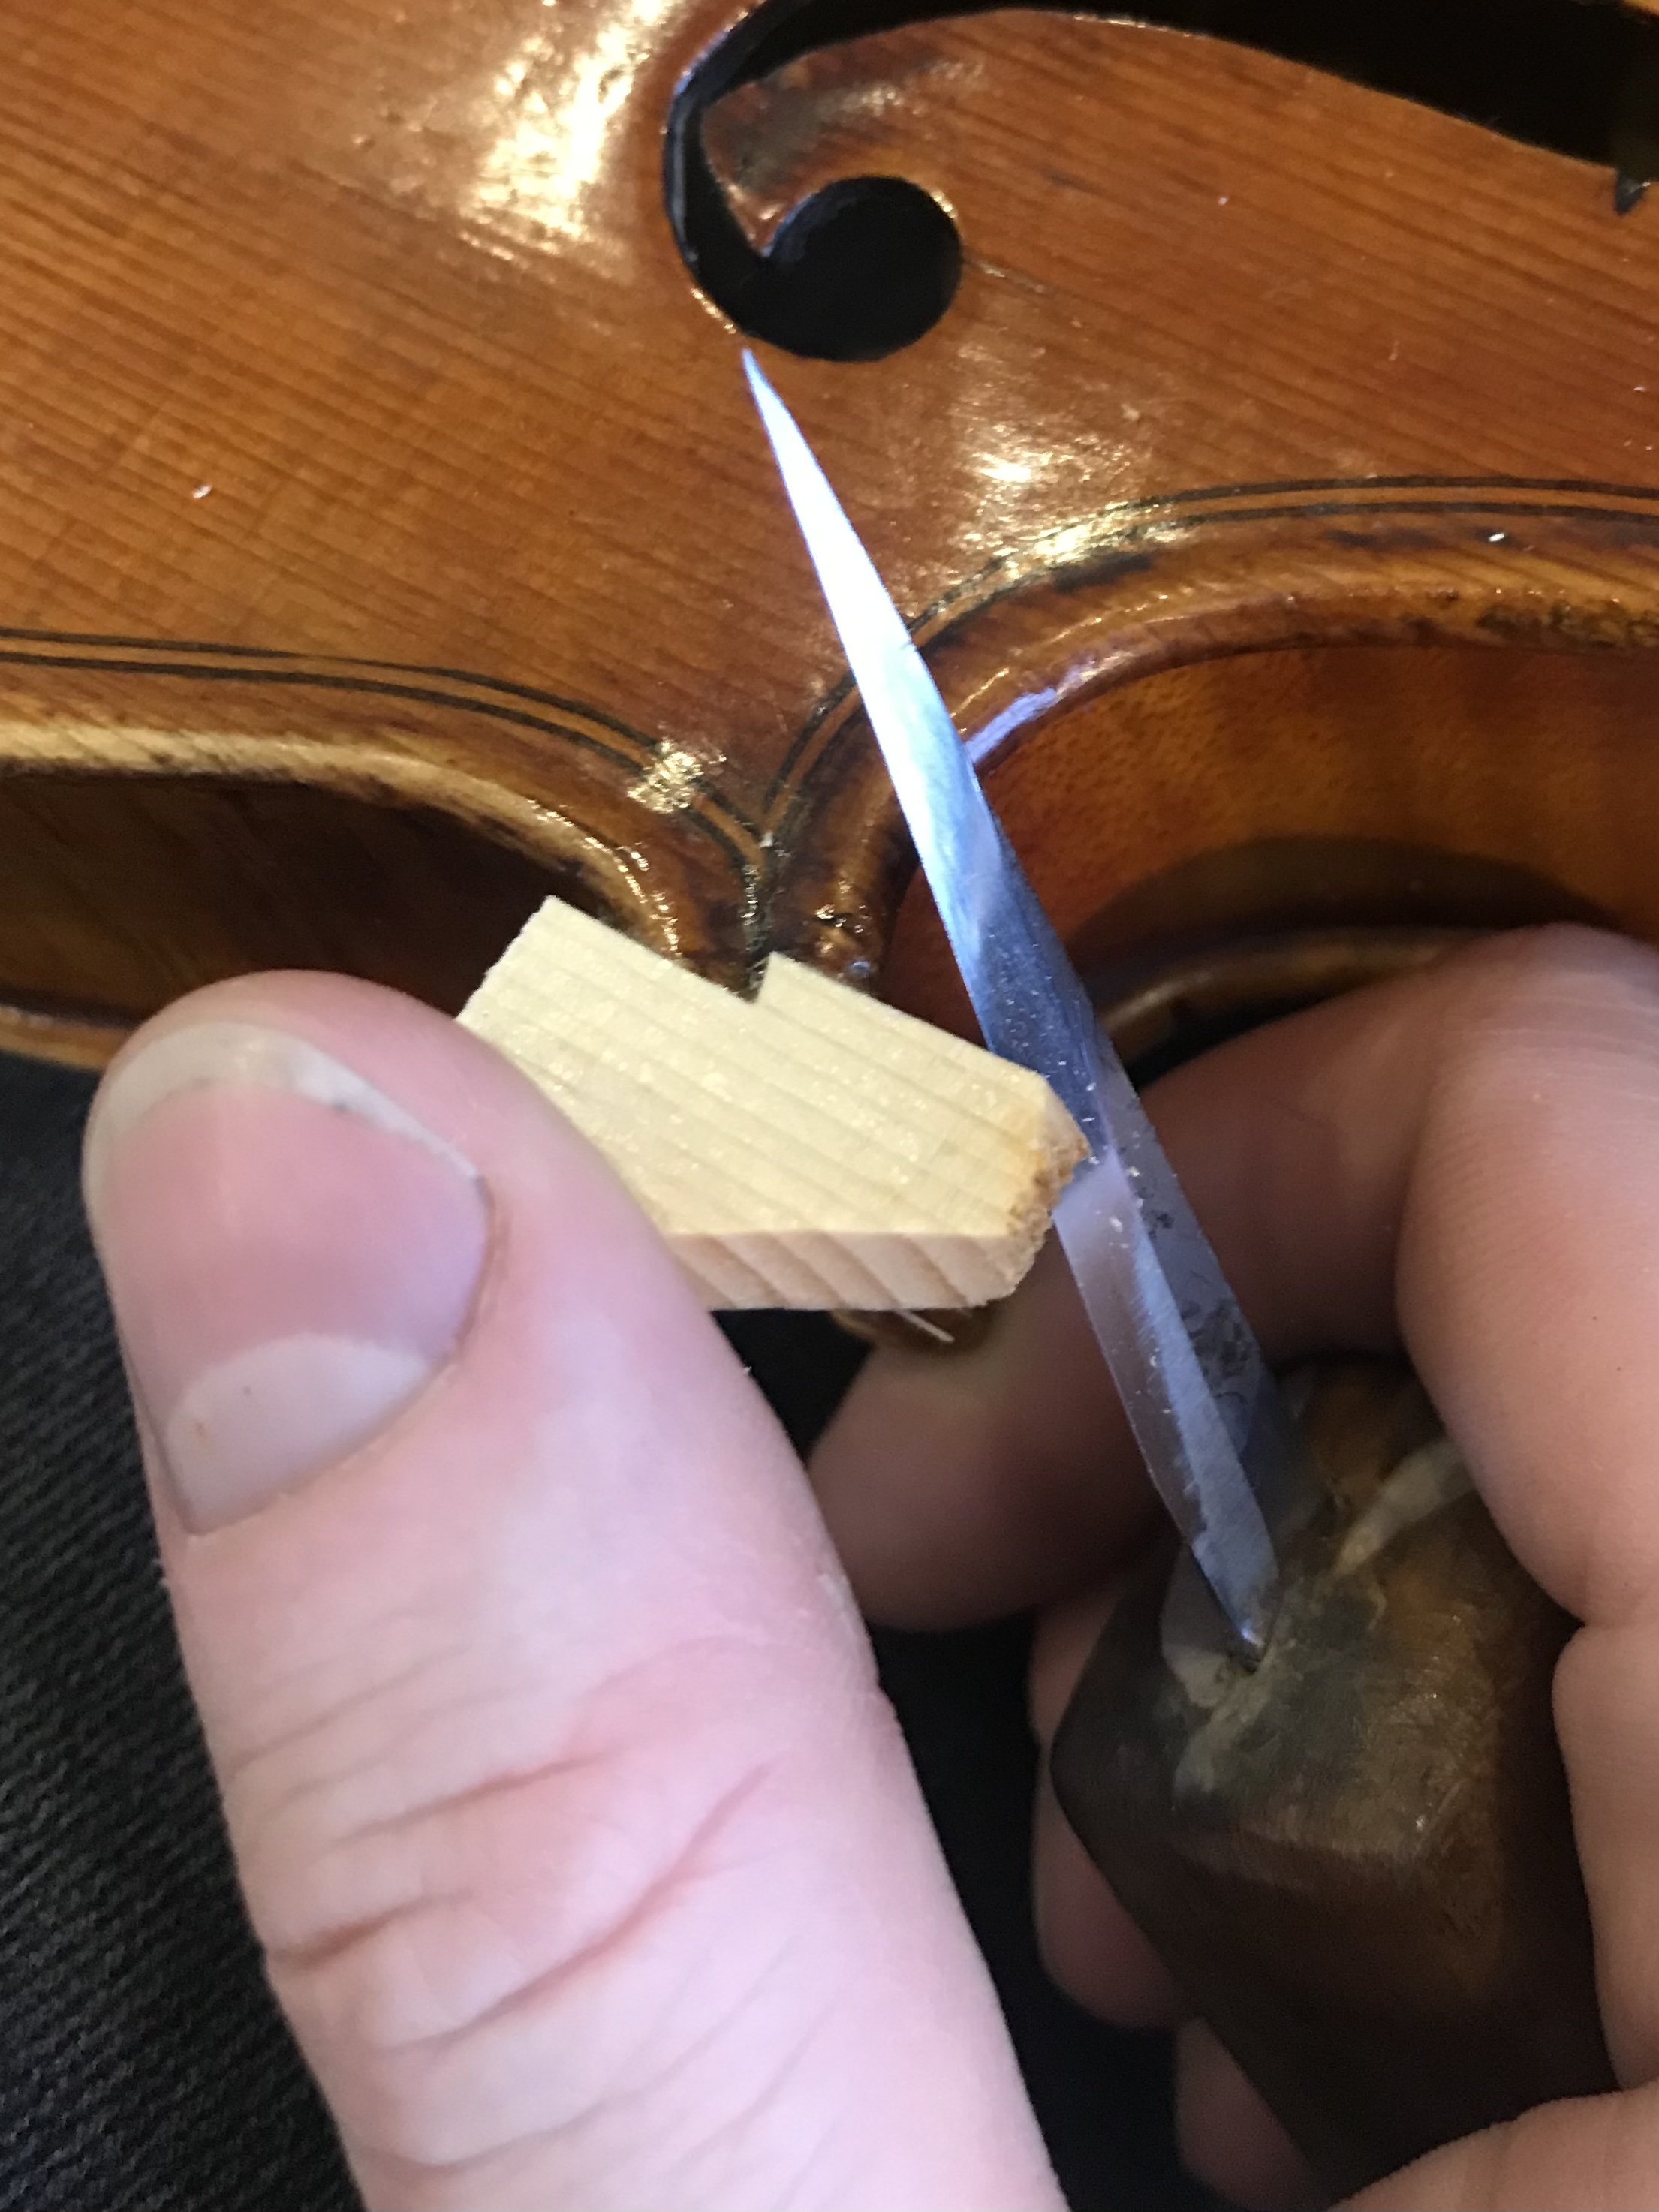
Photo 3: Fitting the new piece of wood to the corner. A piece of very well seasoned spruce, as old as possible, is taken to make the new piece of the corner from. The width and angle of the grain are matched to the original as perfectly as possible. This is to make the joint look invisible and to blend into the corner shape
Photo 4: Gluing the new piece of wood on. After fitting perfectly, ensuring a perfect match, the corner is glued on using hot hide glue heated up in a water bath. Hide glue is an incredibly strong historical glue. It is also reversible if reheated, making it the perfect glue for any future restoration if needed.
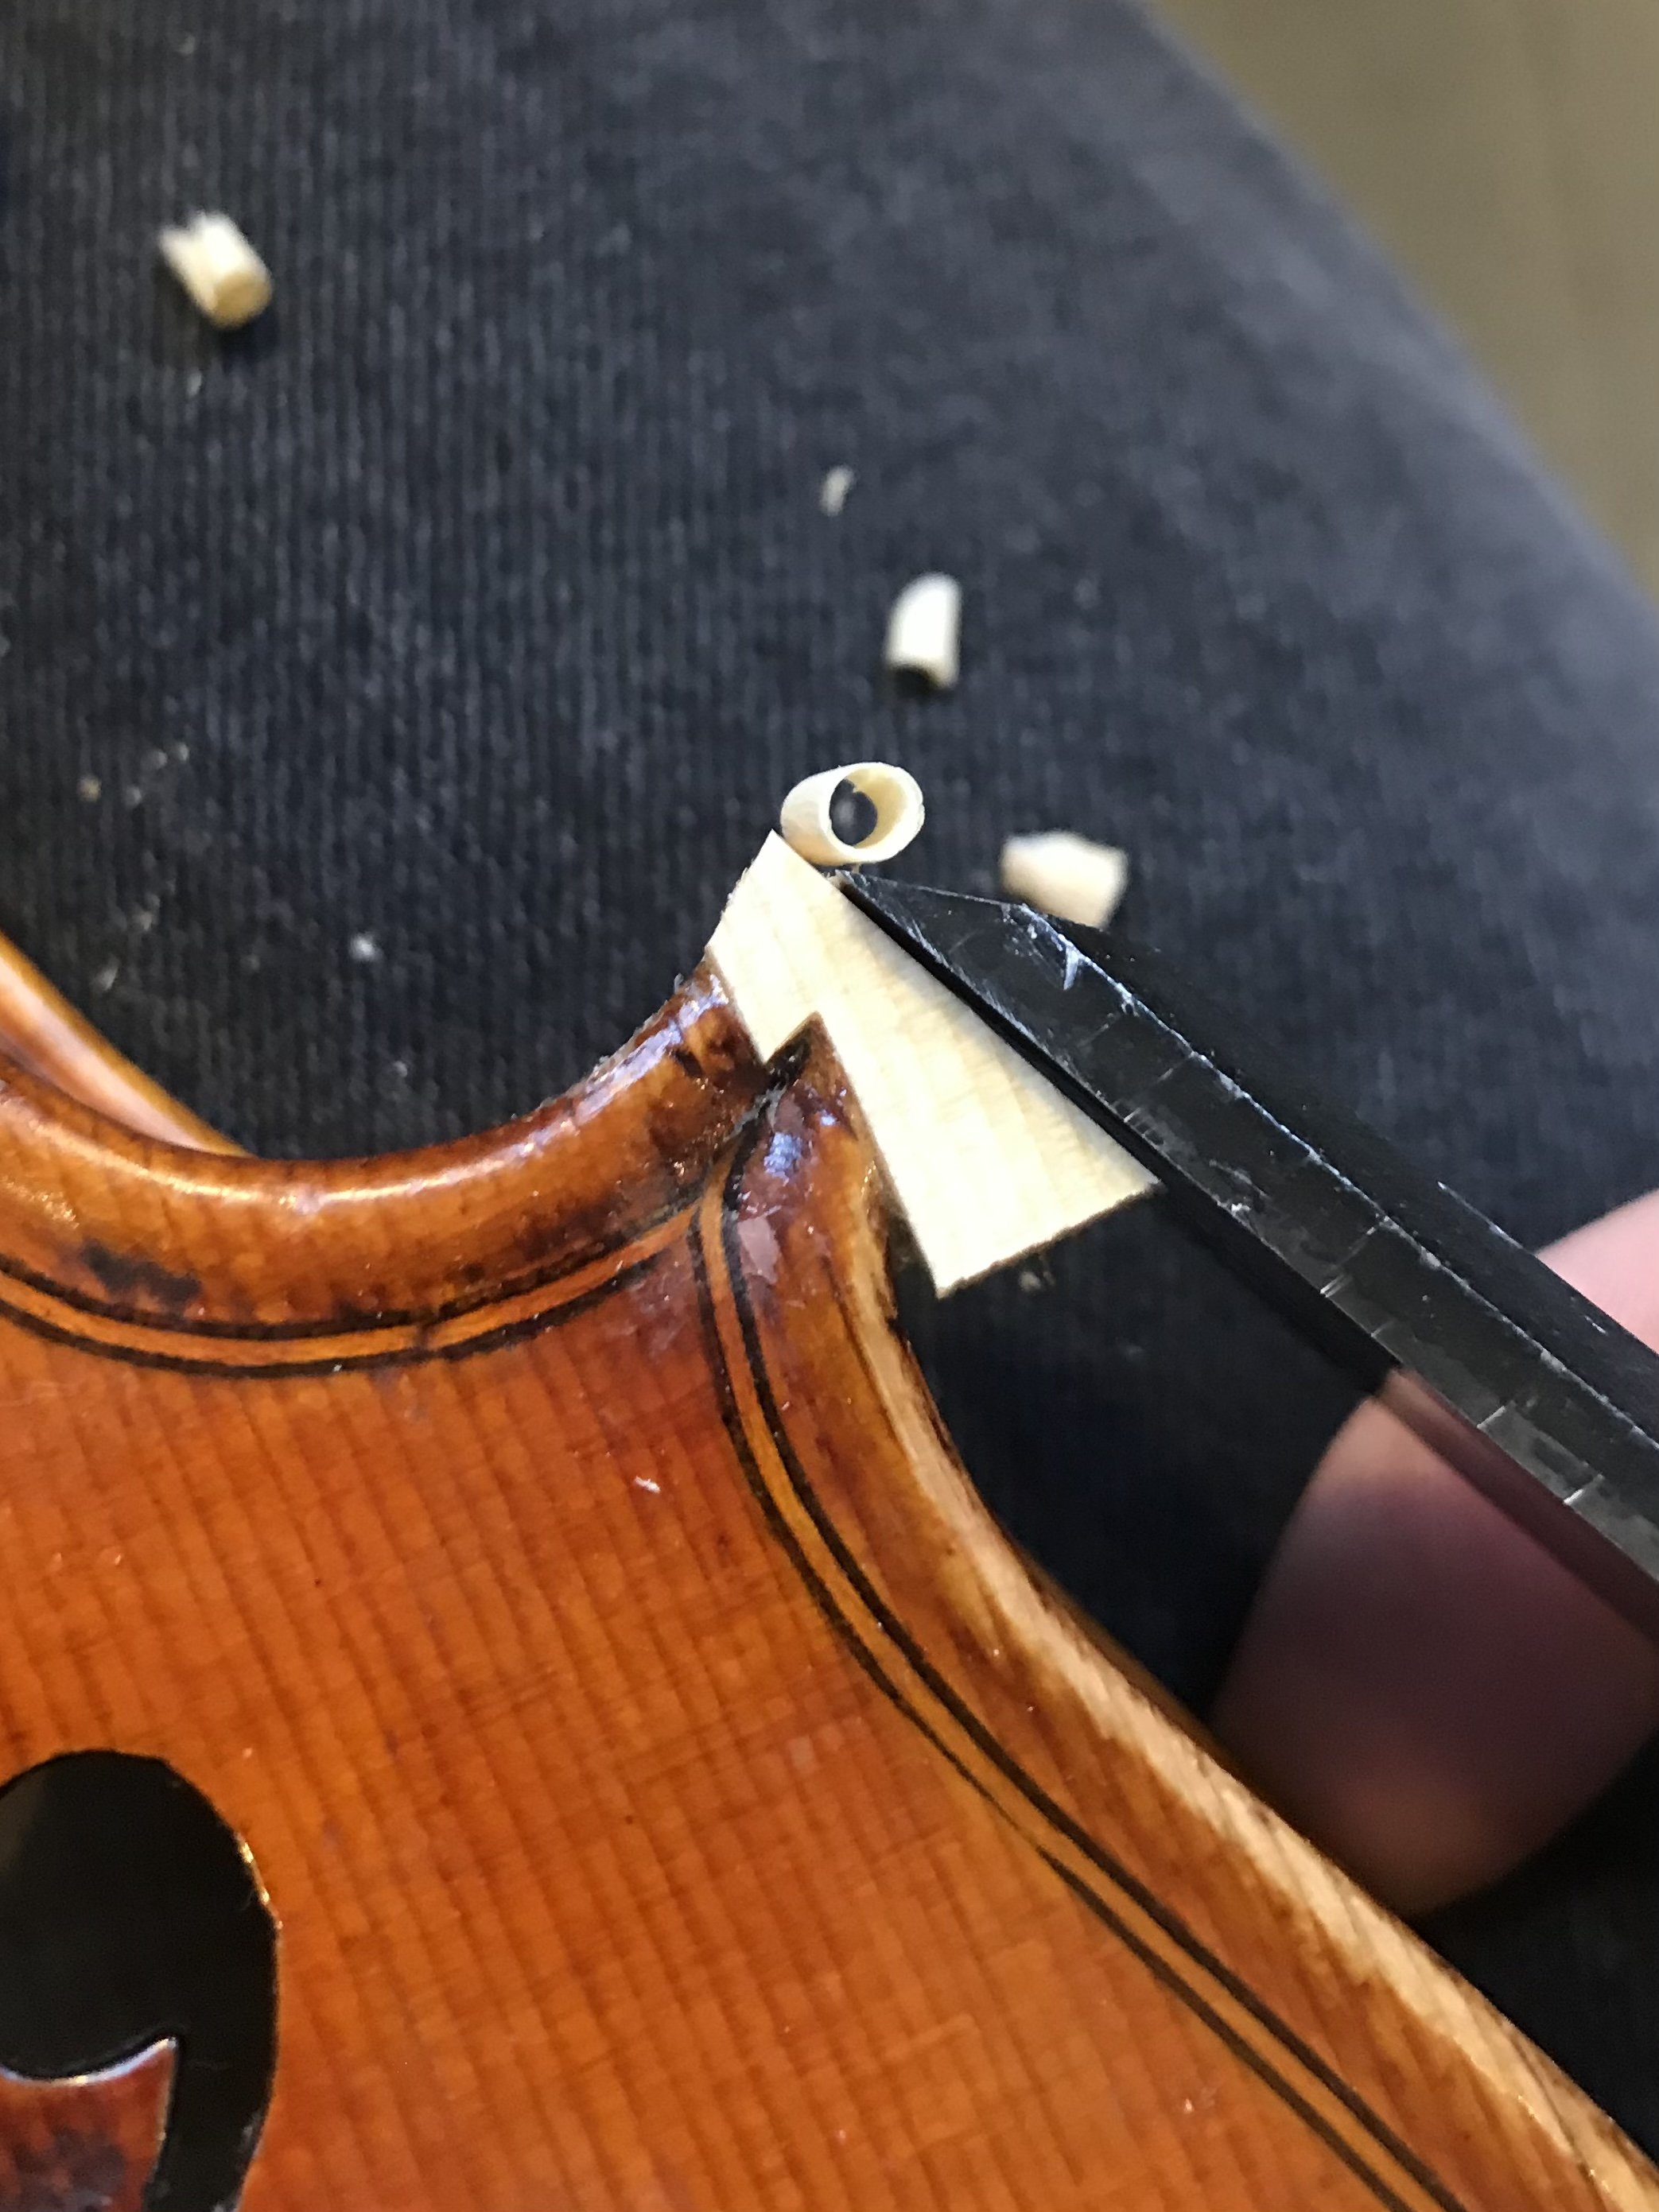
Photo 5: Shaping the new corner. After leaving the glue to set and dry completely for 5 hours, the corner is shaped using a very sharp knife. The curve of the violin outline is continued outward to make it flow.
Photo 6: Cutting the length of the new corner. Using a very sharp chisel, the length of the corner is cut back. An essential measurement taken at the beginning is the overhang from the end of the corner to the rib mitre. This measurement was taken from all other corners and and average taken. The standard overhang is .09” for this violin.
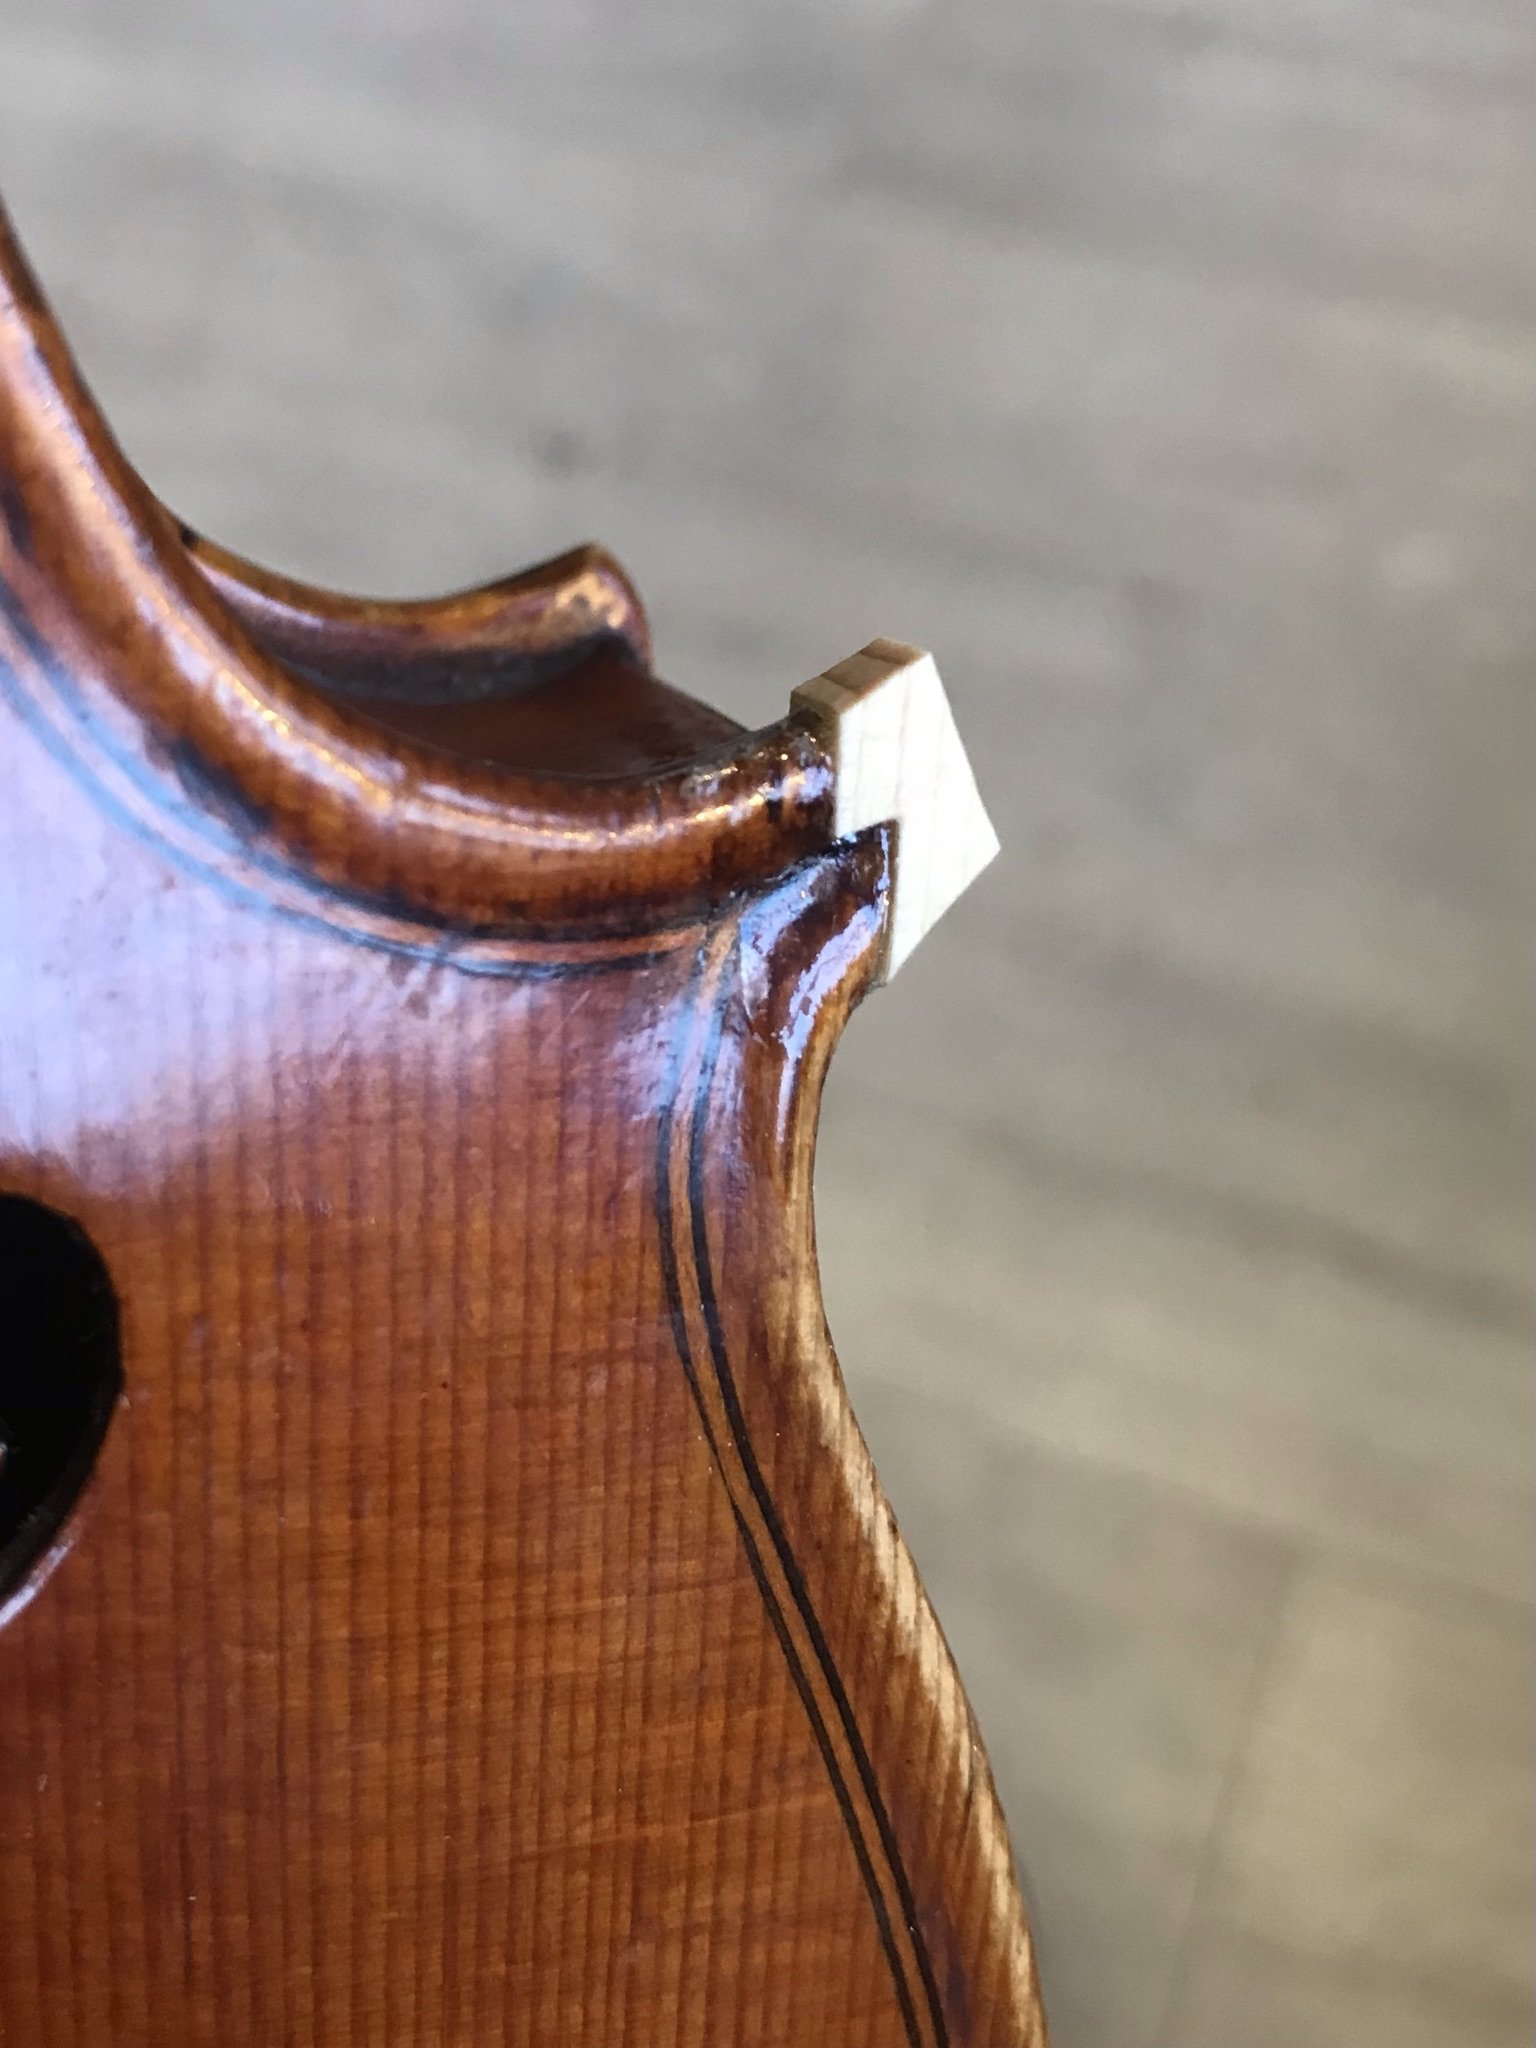
Photo 7: Cutting back the corner. Getting as close as possible with the knife and chisel, the new piece of wood is trimmed back to resemble the corner. It is also essential to angle the corners to the same point on the centre line as the others to get the right shape.
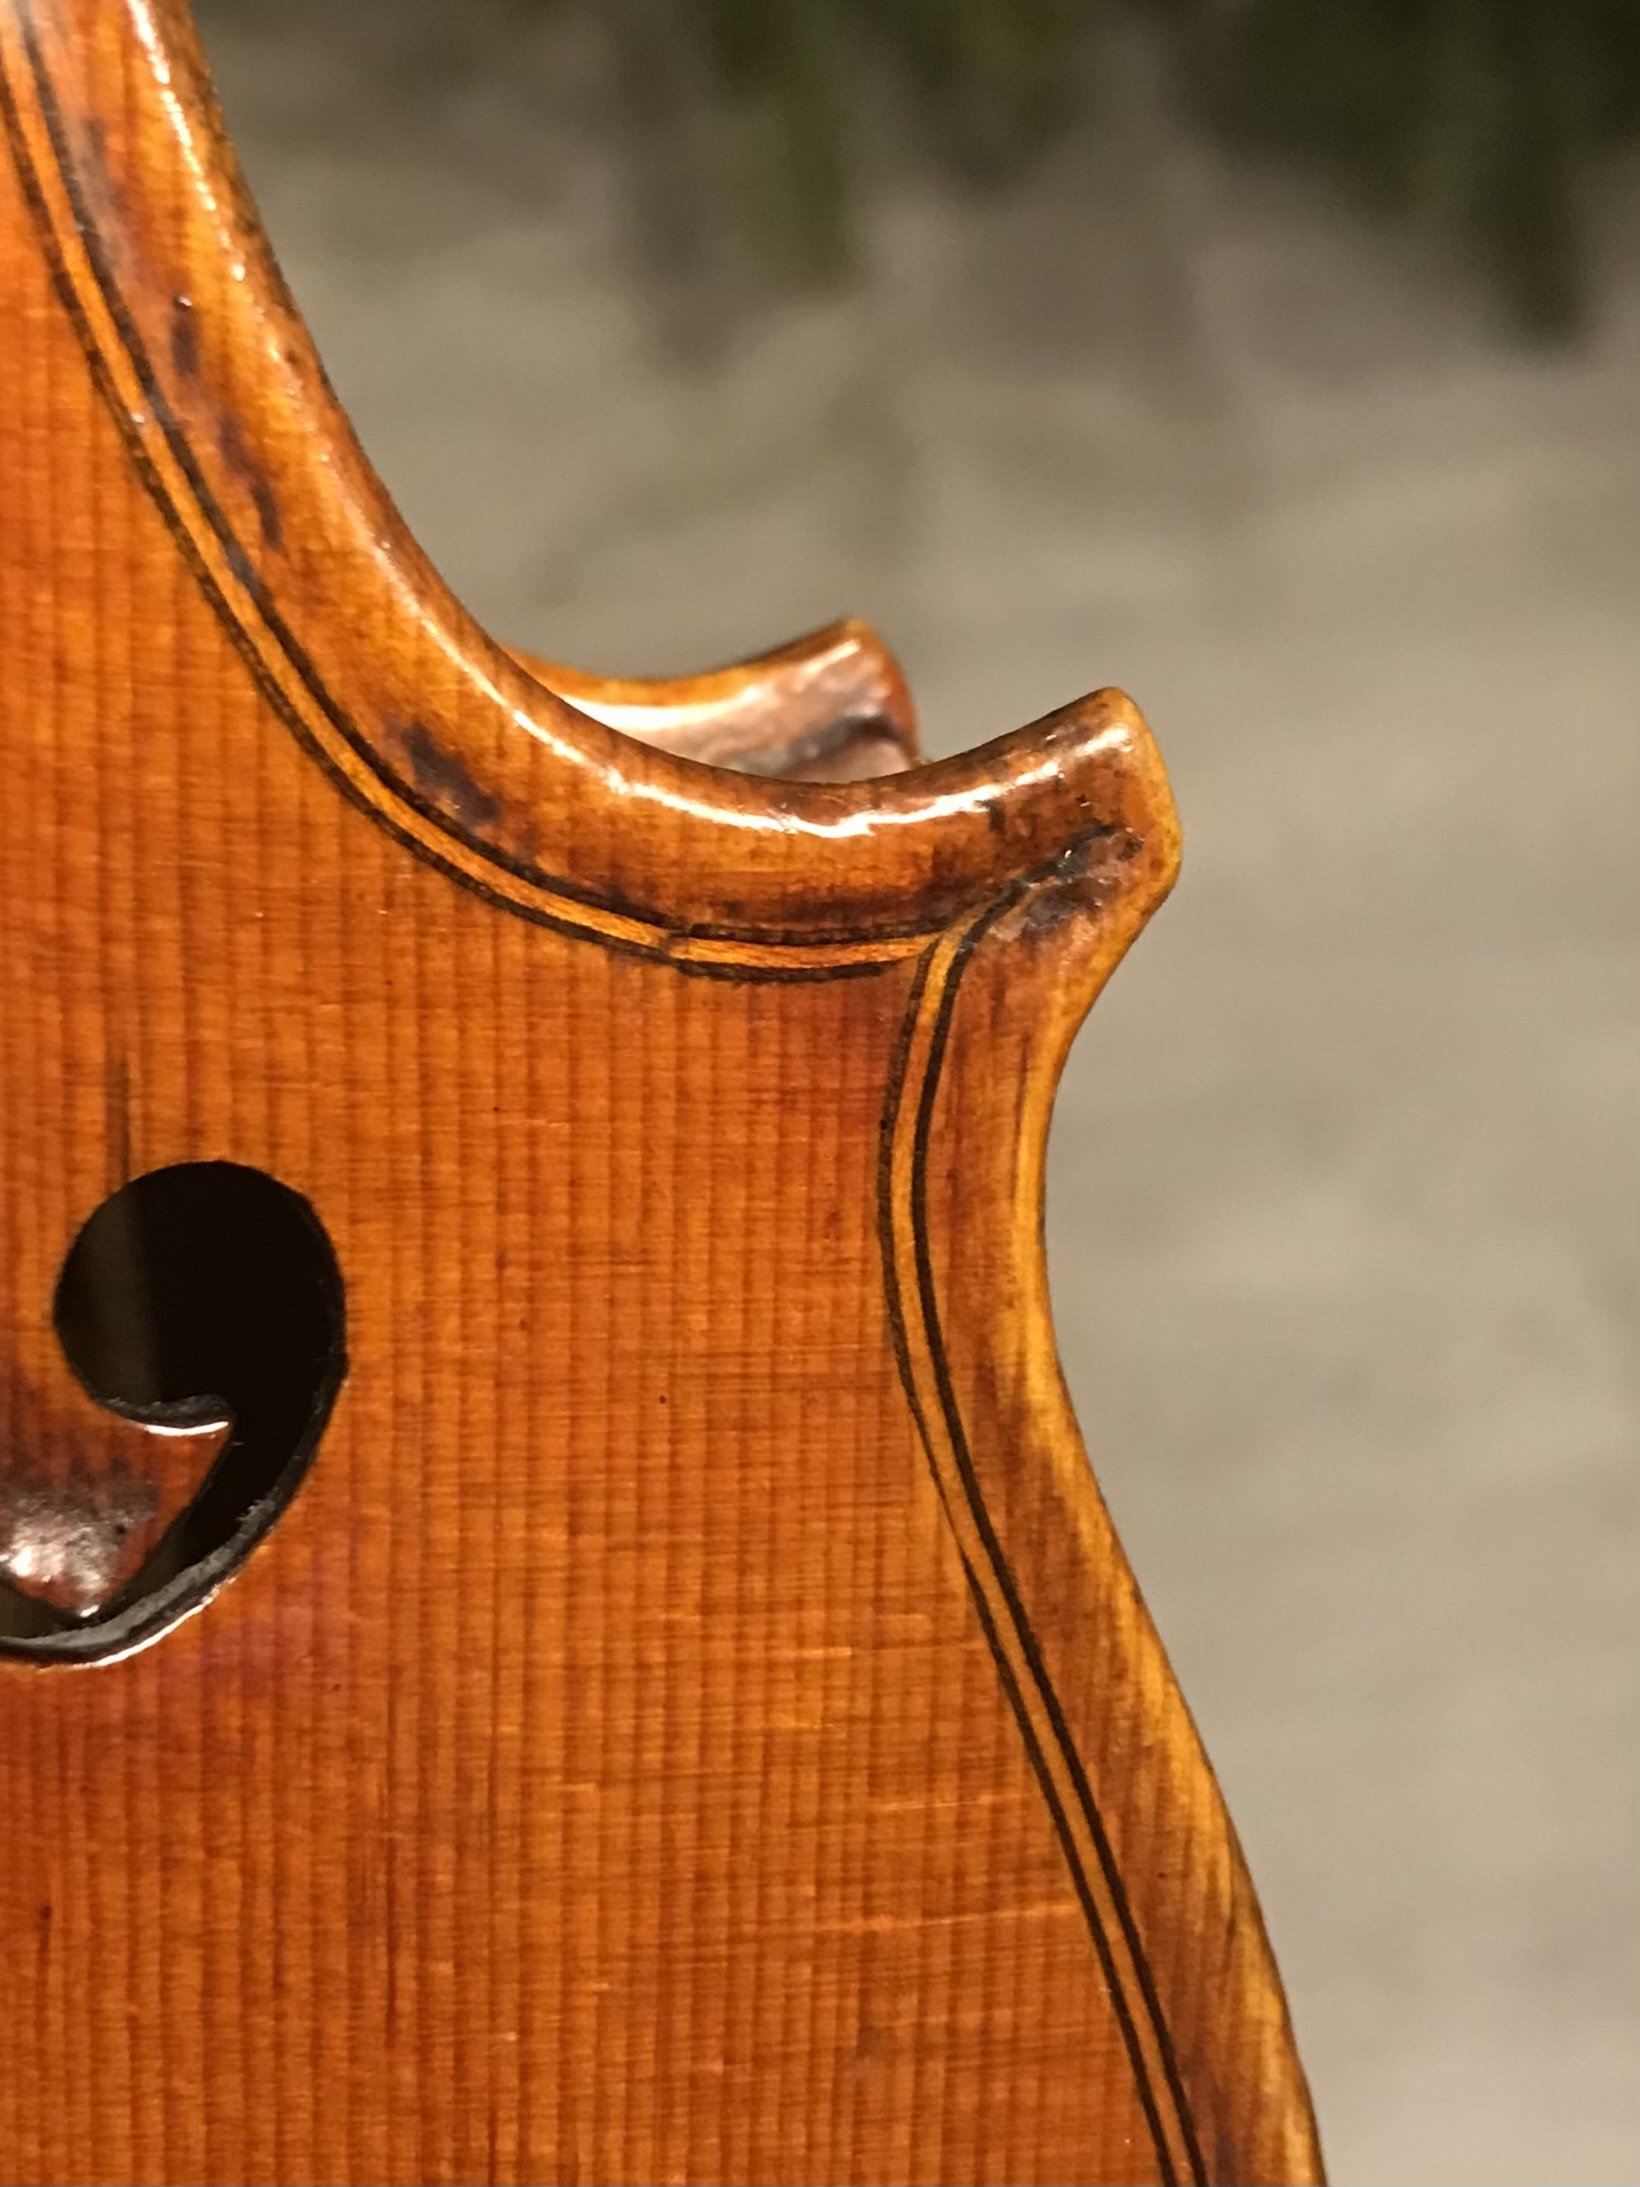
Photo 8: Finishing the shaping. Using curved files and sandpaper, the 3D shape of the corner is made to resemble the original, making it flow as smoothly as possible into the new piece of wood. We can see here the grain of the new piece of spruce matching the original very closely. This will add to the effect.
Photo 9: Retouching the bare wood.
With the shaping finished, the new, bare wood is retouched. This is done with dry pigments (Indian Yellow, Alizarin Crimson, Burnt Umber & Lamp Black) mixed with alcohol and clear shellac. The retouching is done very slowly, starting off by sealing the wood with clear shellac. On top is then added the lighter colours of wood, making it look like one seamless piece of wood.
After sealing with clear shellac again, the colour of the varnish is then added on top. The pigments are mixed together to make the perfect colour. Using fine sable retouching brushes and a pointillism technique, the varnish is slowly added, fading the new colour in under daylight conditions, or using a daylight bulb. When the colour is perfect, thin, clear coats of shellac are added to protect the corner and then left to dry completely.
When dry, the clear varnish is cut back a little to reflect the original texture of the varnish, making sure that the shine is exactly the same. When dry again, it is sealed and finished with a fine wax
Customers are welcome to contact us using the link below, where we aim to respond to you within the hour:
